DIRECT TO METAL PAINT: SMARTER AND SMOOTHER PAINTING PROCESS
Improve your painting process with Direct To Metal Paint. DTM paint combines primer and topcoat in one. Read more about the advantages.
Note: This blogpost is relevant for manufacturers who paint on metal. If you work in another industry, read more about our other industrial coatings.
When it comes to industrial painting, even the most experienced painters can run into coating defects from time to time. In machine manufacturing, surfaces are complex. You have to consider the type of metal, the environment in your production area, leftover oils, contaminants, and salt, which can cause osmotic blistering.
“Osmotic blistering happens when water soluble salts on the surface attract water through the paint film after painting. When the surface gets wet, the salt will draw in moisture. This causes blisters that weaken the paint and will lead to corrosion of the metal underneath. That’s why proper surface preparation is important”, says Tomi Kontunen, Technical Service Specialist at Teknos.
Metal surfaces need tough, high-performance coatings that can handle tough environments, which adds more challenges.
Even with the complexity, we often see 7 very common optical coating defects. Let’s go through them one by one.
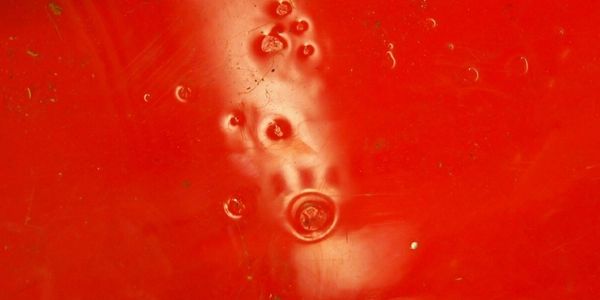
Have you seen these crater-like openings in the paint film? It does not look good. It can appear as the paint has poor adhesion, like the substrate is rejecting it.
Why is it happening?
Oil, grease, silicone, or other contaminants that don't mix well with the paint. Even using silicone spray at a "safe" distance can spread and cause issues with the paint.
How to fix it: Unfortunately, you have to start over. Sand off the paint, clean and redo the paint. Even then, it can be challenging. Silicone is an extremely strong contaminant and can be difficult to remove, even with solvents or other chemicals. If you experience these challenges, contact us - we're here to help.
Tip: Make sure that all equipment and the environment are completely clean and free from contaminants before you start painting. Pay extra attention to silicone. Even a tiny bit of silicone can be tricky and cause fisheyes.
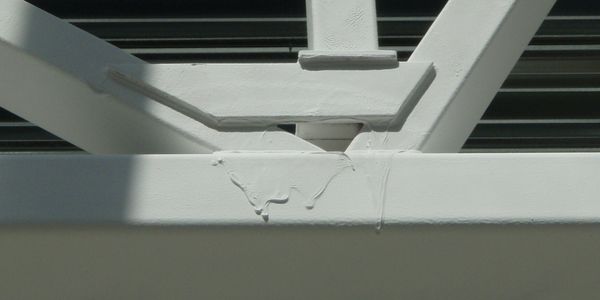
Drips or runs in the paint that forms lines or curtains.
Why is it happening?
There are several reasons for causing paint curtains:
How to fix it:
Did you know?
When you apply a really thick layer of paint, like several millimeters, it’s going to wrinkle first. As it keeps drying, you’ll see those alligator cracks start to form. Too much paint also means it can run – especially if the wet film thickness is more than double the recommended amount.
To avoid this, think about your painting order. Start with the more difficult parts, and save the easier areas for last.
Why – you might wonder? If you start with the easy areas first, you'll have a layer of paint there. Then, when you go back to spray the difficult parts, you’ll end up adding more and more paint to those easy areas. Before you know it, there's too much paint, and it starts to run. That's why I recommend starting with the difficult parts. Getting the right amount of paint in the right order is important.
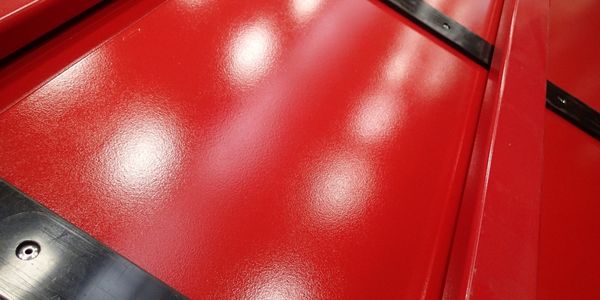
A textured finish that looks like the skin of an orange.
Why is it happening?
How to fix it:
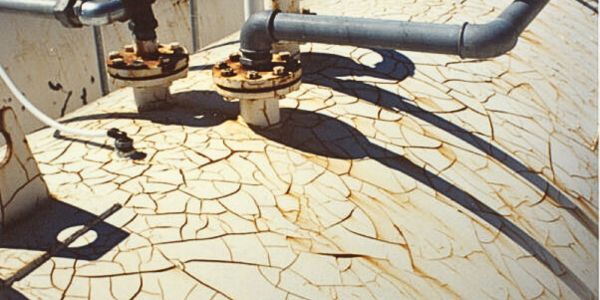
Small cracks show up in the topcoat. The coating looks like the skin of an alligator. That's why we call it alligatoring.
Why it happens:
How to fix it:
Sand down the cracked area and repaint it. Remember to check technical data sheets and instructions for drying temperatures.
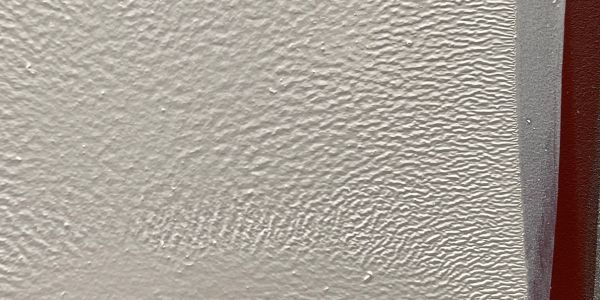
Wrinkled paint, also called lifting, is when the surface looks frosted and has small creases or wrinkles that can go through the entire paint layer.
Why it happens:
“A good example is when a xylene-based topcoat is applied over a white spirit-based primer. Xylene is a stronger solvent than white spirit, which can cause issues like softening or dissolving the primer. This can lead to poor adhesion, cracking, or curing unevenly. In short, using different solvents can cause problems between the layers”, says Tomi Kontunen, Technical Service Specialist at Teknos.
How to fix it:
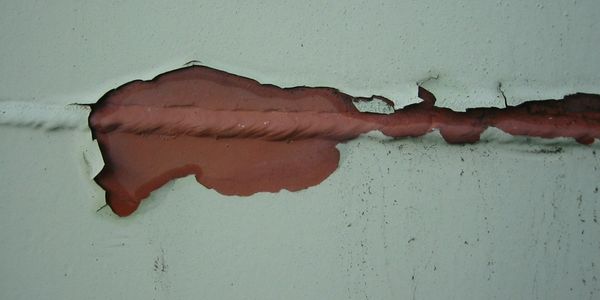
The paint peels off, either from the surface it’s applied to or between different paint layers.
Why it happens:
How to fix it:
Did you know?
If there is moisture or dust on the surface, the paint can start peeling. This often happens in winter when cold metal parts are moved from outside to inside. This causes condensation to form on the surface. To remove the moisture, you need to wait until the metal warms up and the moisture disappears. That’s where the dew point comes in - it’s the lowest temperature where water can condense on a surface. The surface temperature should always be at least 3 degrees higher than the dew point.
To get rid of dust, use compressed air or a vacuum cleaner.
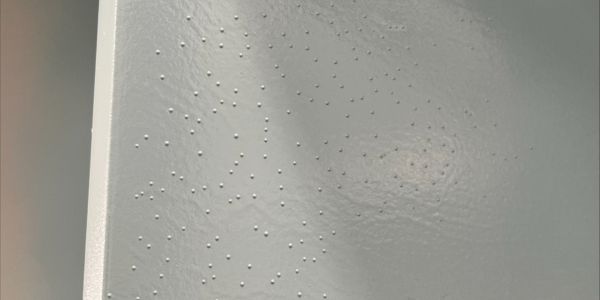
The paint can develop bubbles both on the surface and inside the layers. In most cases, it's visible on the top of the paint, but there can also be hidden bubbles in paint within the layers that are only noticeable if the paint film is cut and closely inspected.
Why it happens:
How to fix it:
Now that you've read about common coating defects and how to fix them, remember this: always make sure to prepare your surfaces properly and check the technical data sheets for painting instructions.
It's often difficult to pinpoint just one reason for surface defects, as they can result from a combination of several issues. On the same surface, you might find bubbles, pinholes, and craters. For example, a crater might be a bubble that has burst after the paint has dried and the surface hasn’t had time to level out. It’s the same phenomenon, just at different stages.
If things don't go as planned, you can always come back to this guide or reach out to us for help. We’re here to assist you in getting the best results.

Technical Service Specialist Tomi has been with Teknos for over 25 years, specializing in metal and concrete coatings. In addition to his civil engineering background, Tomi is a Frosio certified inspector. He supports our customers, providing technical advice and training, helping them achieve top-quality results with Teknos products.
EXCLUSIVE CONTENT
Is your current paint choice silently costing you more than needed? Discover how to cut hidden expenses and improve production output.

EXCLUSIVE CONTENT
Is your current paint choice silently costing you more than needed? Discover how to cut hidden expenses and improve production output.

* Indicates required field
By submitting your contact information, you agree to the Teknos Privacy Statement. Your personal data will only be used by Teknos and will not be shared with third parties.